|
Bridges & Balconies Marathon is an enhanced Aleph-One application, the development sadly enough stopped halfway, and it's development 'may' be picked up by others.
It is NOT competable with Aleph-One's current possibilities, but here's for hoping on a future merge, here is a tutorial how to build maps for B&B. Thanks to Ian Rickard (inio) for the application and thanks to Jonathan Felts for this tutorial. (Also, check out Carlos on the Run, a jawdropping scripted, beautifull marathonconversion with some steep B&B tech, made by Jesse Simko.) Copyright 2001 Jonathan Felts Do not copy or tamper with any parts of this tutorial including the map, the word files, or the script of the map. Under no circumstances are you not going to give proper credit to the creator of this tutorial. |

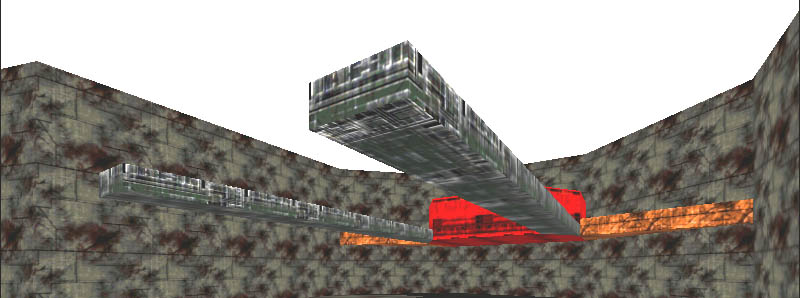
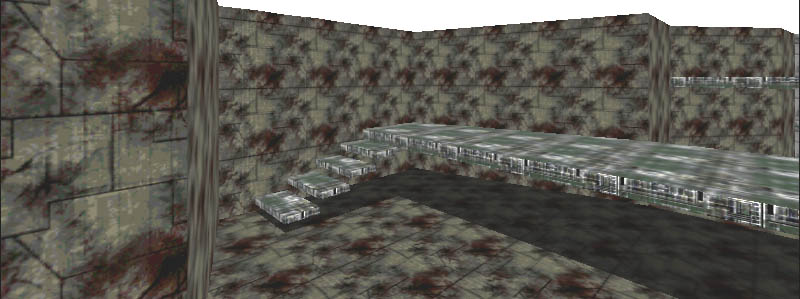
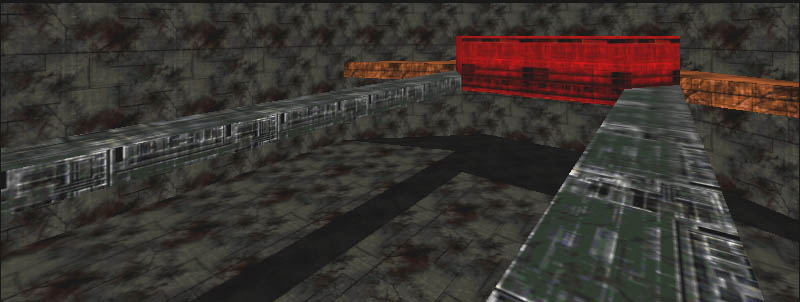
download Marathon B&B at aleph.inio.org 667k download sample-map 8k (e.d. note: this example map is playable without any hiccups with Carlos on the Run, see above for link) INSTRUCTIONS FOR USE OF MAP When you view the sample map make sure that you set the number of colors in the preference window to 256. Crazy things happen when you go higher than that (like crashing your computer for example). This map uses the lava texture set for marathon infinity. For you scenario cats with your many sliced up shapes files everywhere, sit down and conform. |

|
This tutorial was made to help people who do not understand mml or any other
aspect of the 3D insert technology. If there is anything you do not understand
please feel free to contact me and I will clarify the issue for you. My e-mail
can be found at the end of this tutorial.
THE ONLY WAY YOU COULD NOT UNDERSTAND THIS TUTORIAL IS BECAUSE OF AT LEAST ONE OF THESE THREE REASONS. A) You don't know how to click a mouse B) You can't read English C) You are the little Engine that couldn't Programs needed: ------------------------------------------------------------- ResEdit Aleph One B&B http://aleph.inio.org/ ------------------------------------------------------------- All right, lets start by showing you what you need for the scripting you will soon write to be utilized by Aleph One. Open up your Aleph One map using res edit. You then need to create a new resource by going to the resource drop down menu and selecting create new resource. You should come to a window that gives you a list of all of the different types of resources that you can use. Ignore the list and type in TEXT to the left of the list. Click OK. You should now come to a new blank screen. Repeat what you did before and create a new resource. You should now have a line of text that has an ID of 128. Ignore the number to the right, that is unimportant. Double click the 128 and type this into the new screen that comes up. <marathon_levels> <level index="0"> <mml resource="1000"/> </level> </marathon_levels> This creates an mml resource that tells your map that it is going to use mml. To make a resource for other levels like say, level 2, you would replace the 1000 in line 3 with 1001. For level three you would put 1002 and the list goes on. Now go back to the screen with your number 128 and create yet another resource. This resource should have a number of 129. Select that resource by clicking once and then go to the resource drop down bar and go to the bottom of the list. You should then select get resource info and a new window will open. In that window, replace the 129 in the id box to 1000. This tells the other resource you created that it is meant for 1000, or, level 1. Click ok and double click resource 1000. This is where we get to the meat of the process, and the most confusing. I do not fully understand it myself, but I will explain to you in the best way that I know. In the first line of your script you must put <marathon> to tell your map that it is for the Marathon. On the next line you would put <inserts world_units="true"> to tell your map that you are going to use the 3d platform technology. The next line is where you will put your polygon information and start to form your 3d platforms. This next line that I am about to show you is the scripting that is going to select the polygon that you are going to use to make a platform. To show this you would type <polygon_insert poly="xxx"> where "xxx" is the number of the polygon that you are going to make 3d. If you want to lift more than one polygon with the same features, say, two square polygons that are right next to each other, you would put the two numbers (of the polygons) in the parentheses in the polygon insert line (line 3). It would look something like this: <polygon_insert poly="xxx,xxx"> The "xxx,xxx" is showing the map that you want two polygons to have the same characteristics. Remember that a comma separates each polygon. Now that you have that down we can begin to give the platform some depth by adding heights for the floor and the ceiling. So far what we have covered looks something like this: <marathon> <inserts world_units="true"> <polygon_insert poly="xxx"> The next line that you are about to type out is going to tell the platform what the top height is, along with the texture and the light. The line of script is going to look something like this: <top height="x" texture="x:x" light="x"/> Now lets examine what the first x represents. First look at the two words that are in front of it. These words are just telling your map that you are about to set the height of the top of the platform. Following that is an = sign that simply tells the map that "x" is going to equal the top height. You would set this as you would set it in forge. For now we are going to set it to 0.5 just for the sake of example. Now turn your attention to the next part of the line. The word texture is simply letting your map know what texture you want the top of your platform to have. Now you may notice when you look at "x:x" that there must be two numbers to define. The first number tells your map which texture set you are going to use, and the second number tells it which bitmap (texture) you are going to use. So if you put "18:12" in that spot you would be using the lava texture set with the lava texture in the 12 bitmap. You can find what numbers you need by opening a shapes file with anvil and choosing a texture set. The drop down menu has a number next to each choice in chronological order. Just look at the number next to the texture set that your map is using and place that number in the first "x" position. Once you have selected your texture set you can now place a specific texture to your platform. Just single click the texture that you want and the bitmap number will be in the bottom left corner of the anvil application. Place that number in the second "x" position. Now we move to the last part of the line of text. The word light is telling your map that you now want to choose the lighting for the top of your platform. The "x" is simply the light that you wish to use based on the numbers in forge. Congratulations. You just selected how high the top of your platform is going to be along with the texture that is going to use and the lighting for the platform. Here is what it should be looking like so far: <marathon> <inserts world_units="true"> <polygon_insert poly="xxx"> <top height="x" texture="x:x" light="x"/> Easy right? Lets move on. Now that you have the top of your platform you have to remember that since it is a 3d object that is off the ground, it has to have a bottom also. Lets take a quick look at what the scripting for the bottom is going to look like: <bottom height="x" texture="x:x" light="x"/> As you can see, it looks exactly like the script for the top except for one word, bottom. This word simply tells the map that these preferences are for the bottom of the platform and not for the top like we previously just did. Just set the "x" variables to the desired settings and you are done here. Make sure that the bottom height is lower than the height that you set for the top. Also, make sure that the polygon that you are making into a platform is set at the same height as the floor in forge. What I mean is, while you are working on the map in forge, make the area where the platform is going to be created have the same height as the floor around it and not the height that you want your platform to be. This will result in a simple raised floor that could easily be made with forge. Now that you have the structure of your platform in the air, you need to texture the walls that are surrounding the platform. The line of script that does that looks something like this: <side_insert lines="x" texture="x:x" light="x"/> The first section of this line is just telling your map that you are going to insert some textures on the lines on your platform. The next part (lines="x") is telling your map which sides of your platform are going to be worked with. You can find the number for the lines using forge. Just open your map and single click on the line that your platform is using and set it to the first "x" in that line of script. You could keep writing a new side insert line for every line surrounding your platform, or you could put them all into the first x and divide them with commas. Say, if you needed three lines to be selected in the side insert line it would look something like this: <side_insert lines="x,x,x" texture="x:x" light="x"/> This only works if you want all of the sides to that platform to have only one texture. If you decided that you wanted them to have different textures then you would have to make a separate line of script. Now we will move on to adding more than one platform and finishing the script, but first, take a look at what we have done so far: <marathon> <inserts world_units="true"> <polygon_insert poly="xxx"> <top height="x" texture="x:x" light="x"/> <bottom height="x" texture="x:x" light="x"/> <side_insert lines="x" texture="x:x" light="x"/> After you have set the parameters for the platform, you need to end the this particular platform script. To do this you would first add this line of text: </polygon_insert> Notice that there is a backslash right before the word polygon. You will notice that polygon_insert is also at the top of your script right before the top parameters to your platform. This new line that we added ends the polygon_insert command by adding the backslash. To get a better understanding of this concept, here is an example: <polygon_insert poly="xxx"> </polygon_insert> Take out polys="xxx"> and you are left with <polygon_insert> so having the same command at the end with a backslash to symbolize the end of that portion of script makes sense, doesn¹t it? Now that you have ended that sequence you can go two ways. You can either start another sequence for another platform or end the entire script. First we are going to discuss the former one. So you now have your 3d polygon, but you are still not happy. You want more. So instead of finishing off the script, you make another sequence for your next polygon. It is actually a very simple a thing to do. All you have to do is make another set of parameters that are like the ones before it. Here is an example to help you out: <marathon> <inserts world_units="true"> <polygon_insert poly="xxx"> <top height="x" texture="x:x" light="x"/> <bottom height="x" texture="x:x" light="x"/> <side_insert lines="x" texture="x:x" light="x"/> </polygon_insert> <polygon_insert poly="xxx"> <top height="x" texture="x:x" light="x"/> <bottom height="x" texture="x:x" light="x"/> <side_insert lines="x" texture="x:x" light="x"/> </polygon_insert> As you can see here, making another set of instructions is not a very difficult thing to do. All you have to do is add the same list of parameters after the </polygon_insert> command with different variables to suit your next platform. Now that you have put all of the information that you need to you can end the script and play your wonderful new creation. This is also a very simple procedure to follow. Here is the line that you would implement after you type the </polygon_insert> command. Just like you ended the polygon insert command, you now have to end the <inserts> command. This can be located on the second line of your script. The command that you need to end it is simply this: </inserts> That's it. Now you have one more line to create to end your scripting. This line is also a very simple thing to learn. This command that you are about to see ends the <marathon> command. </marathon> Notice again the backslash? Get used to it because you will be using it a lot in your scripts. To recap on everything that you just learned, here is the sample code in its entirety: <marathon> <inserts world_units="true"> <polygon_insert poly="xxx"> <top height="x" texture="x:x" light="x"/> <bottom height="x" texture="x:x" light="x"/> <side_insert lines="x" texture="x:x" light="x"/> </polygon_insert> <polygon_insert poly="xxx"> <top height="x" texture="x:x" light="x"/> <bottom height="x" texture="x:x" light="x"/> <side_insert lines="x" texture="x:x"light="x"/> </polygon_insert> </inserts> </marathon> Kudos on your accomplishments! You have just made your first script for your level. Now you can enjoy the true 3D feeling with pride. Yes, you may beat your chest with your fists or run stir crazy with your pants off, if you feel so inclined to. Savor the moment because things get harder as you go along. But that is for another tutorial on another day. Enjoy what you have done and experiment to get your desired look. |
|
Contact Information Name: Jonathan Felts E-mail: darkmapper@forerunners.org Website: darkmapper.forerunners.org ICQ #: 69344589 Feel free to contact me for anything about this tutorial. Also, I am often on the hotline server hl.forerunners.org if you would like to talk to me there. |

